Until now the PC users were familiar with the control panel to access the PC setting but with the introduction of Windows 8 by Microsoft, things are going be be little different now. Along with the control panel, Windows 8 introduces a new hub called 'PC Settings' that allows you to configure you PC as per your choice by changing different settings. This tutorial will tell you how to access PC setting in your Windows 8 operating system computer.
Step 1: To start with, first go to the Start menu of Windows 8 and select PC Settingsfrom the All Programs menu.


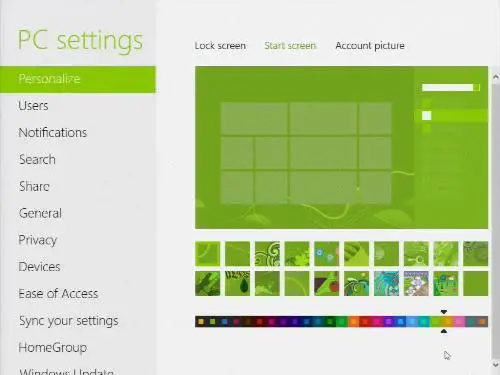
Step 2: Once you enter the PC Settings menu you will find different options of PC Settings and you can access the settings of your PC as per your choice.

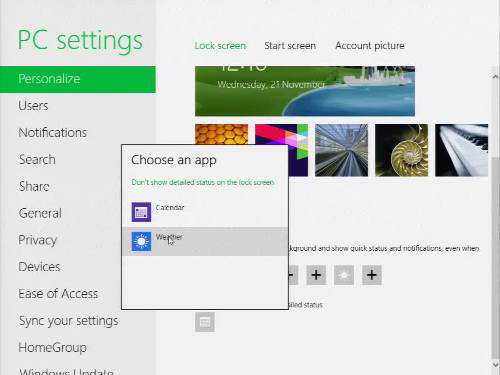
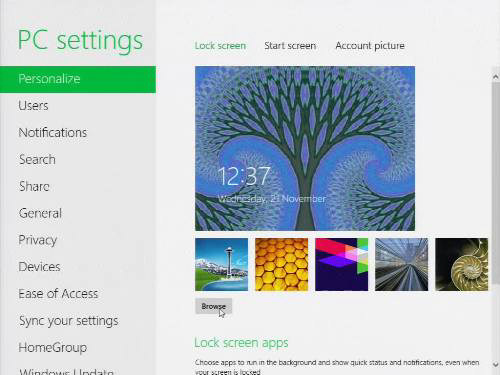
Step 3: The Personalize section enables the user to change settings for your Lock screen, Start screen and Account picture. You can easily change lock screen wallpaper, select apps like Calendar, Messaging and Email to show their status and notifications on lock screen. In addition to that, the user can also select other apps like Calendar to show additional information of tour plans and appointments.
Step 4: By clicking to the Start Screen settings, the user can select or change the background for the start menu including the background color, from the list of colors and designs already available.


 0
0

1

 2
2

3

 4
4
5

 6
6

7

 8
8

9
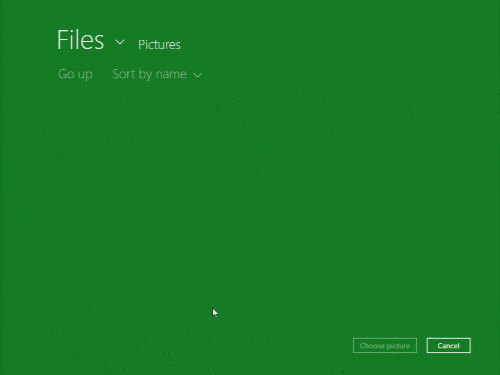
Step 5: In the Account picture section, the user can change the account picture by selecting an existing file on the computer or SkyDrive, or can click a picture directly from the camera of the computer as per their wish.
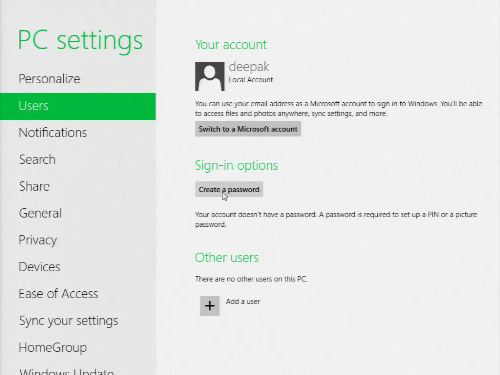
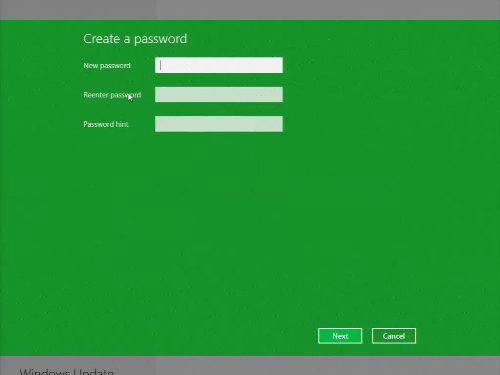
Step: 6: User settings enables the user to login into their Windows using their Microsoft account or by using their local account. In addition to that, you can also create a 4-Digit password or picture password to log in. Moreover, you can also change your existing password in this section. The user setting also enables the user to wake the PC and access the already signed-in user without entering the password. The application also allows you to add new users by clicking Add a user, and remove existing users? accounts. 0

 1
1
2

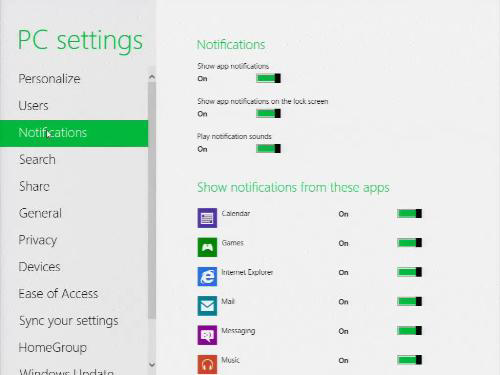
Step 7: Next, in the Notifications section, you can manage all your notification settings from the list of options by turning them on or off. In this, you can manage whether the notifications would be displayed on your lock screen or not, you can enable or disable sound effect when any notification comes. in addition to that, you can also enable or disable notifications for Calendar, Internet Explorer, Mail, Messaging, Music, Store, Video and other installed applications.
 3
3
Step 8: In the search section you get the options to choose options to enable or disable the search history of Windows by turning on or off the options. You can also set options to show the Windows the highly searched applications on top. in addition to that, you can choose your favorite application that you want to provide you with additional search results.

4
Step 9: Share option allows you to adjust the applications that you want to appear upon clicking on ?Share? from the Charms bar. In addition to that, it also allows you to organize the applications in the list based on frequency of use.

Step 10: In this section, you can set your time zone, enable and disable application switching between recent applications, autocorrect settings, language settings, PC reset options and advanced system startup and restore settings. 5

Step 11: Privacy setting enables you to allow or deny application access to your personal information such as location, real name and account picture. In addition to that, users can also select whether the applications can send the recently used website links to Windows Store or not.
 6
6
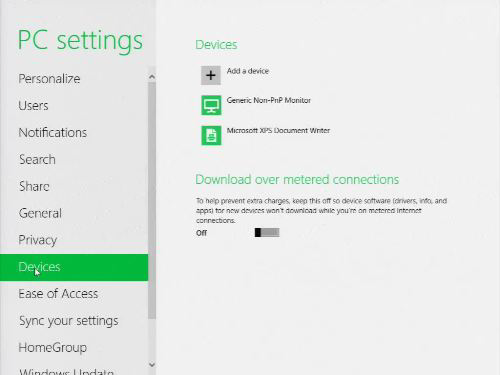
Step 12: The devices section allows you to manage all the devices connected to the computer and its network. In addition to that, you can also chose a device driver software downloaded through internet if you are using any metered internet connection.
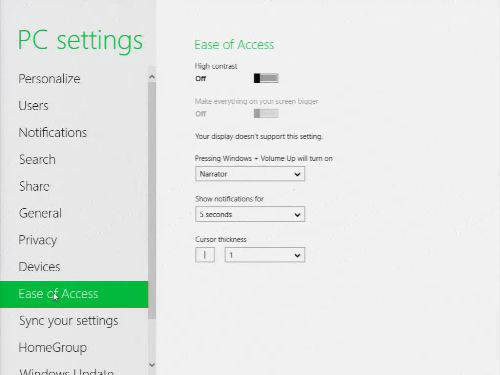
Step 13: In ease to access section, you can manage the accessibility settings of your computer such as high contrast, large text, caret browsing, narration, notification display time, cursor thickness etc as per your choice. 7
 8
8
Step 13: In the sync your settings section , you can choose the settings you want to sync with Microsoft account, and manage how Windows syncs to all the PC settings such as personalize, passwords, ease of access etc. on your computer.
 9
9
Step 14: Under this section, you can join a HomeGroup to share documents, music, pictures, videos, printer and devices with other computers on the same HomeGroup easily. In addition to that, you can create Home Group of your own here that generates a password that you can use on other computers in order to join it.

Step 15: Windows Update is the last section of PC settings that allows you to check the available updates and install them. 0
