
Web application uses the HTML standard to make the form which runs in browser of the client, HTML provides all the components necessary for creating the web application. Server side application generates the HTML pages on the fly which runs in the browser. In this tutorial we will learn how to write Java and JSP code which will generate HTML form.
We are using Eclipse IDE to develop, build and deploy the application on Tomcat Servlet container, we have integrated the Tomcat with the Eclipse so that application can be easily tested from the Eclipse. If you don't know how to Integrated Tomcat in Eclipse then check our tutorial JSP Hello World example using Eclipse IDE and Tomcat web server.
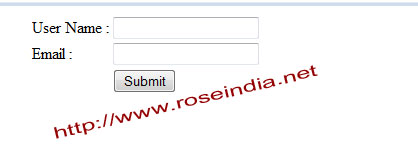
In this tutorial we are creating a simple form in Spring MVC which displays two fields:
User Name: <input field>
Email: <input field>
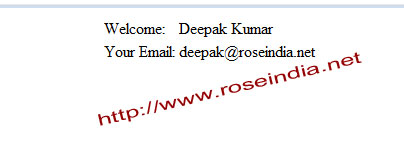
and a submit button, when user presses the 'Submit" button it displays the entered data.
Here is the screen shot of the input form:
When user clicks on the 'Submit' button, following screen is displayed with the data:
Video instruction of the tutorial: In the following video we have explained you all the steps to run the example program.
How to develop simple form in Spring MVC?
Following components needs to be developed and integrated in order to run a simple form in Spring MVC:
1. Form Class (User.java)
The form class contains the variables to hold the form values entered by user in the web browser. Our User.java class file contains two variables:
private String userName;
private String email;
Above two variables are used to get the values of user name and email fields.
Here is the full code of the User.java class
package net.roseindia.form;
public class User {
	   private String userName;
	   private String email;
	   public void setUserName(String userName){
		      this.userName=userName;
		  }
	   public String getUserName(){
		      return userName;
	   }
	   public void setEmail(String email){
		      this.email=email;
		  }
	   public String getEmail(){
		      return email;
	   }
 }
2. Form Controller class (SimpleFormController.java)
The form contoller class in Spring Web Framework is responsible for process the request from browser. In our example SimpleFormController.java class will handle the above post and then fill the values in the User.java class object. Then we can use the values to for saving into database or in this case just displaying on the browser.
Here is the code of SimpleFormController.java file:
package net.roseindia.controllers;
import net.roseindia.form.User;
import org.springframework.stereotype.Controller;
import org.springframework.ui.Model;
import org.springframework.web.bind.annotation.ModelAttribute;
import org.springframework.web.bind.annotation.RequestMapping;
import org.springframework.web.bind.annotation.RequestMethod;

@Controller
public class SimpleFormController {

	@RequestMapping(value = "/simpleForm.html", method = RequestMethod.GET)
	public void simpleForm(Model model) {
		   model.addAttribute(new User());
	  }
	@RequestMapping(value = "/formoutput.html", method = RequestMethod.POST)
	public void simple(@ModelAttribute User user, Model model) {
		   model.addAttribute("user", user);
	}
}
Above controller class handles two requests:
a) "/simpleForm.html": This is the get request and it displays the input form to user. This requests uses simpleForm.jsp for generating the HTML form and displaying it on to the user browser.
b) "/formoutput.html": This is used to process the form post and finally displays the message to the user. It uses the jsp file formoutput.jsp file for displaying the message to user.
3. simpleForm.html: This page generates the input form and here is its full code:
<%@ page language="java" contentType="text/html; charset=ISO-8859-1"
    pageEncoding="ISO-8859-1"%>
<%@taglib prefix="form" uri="http://www.springframework.org/tags/form" %>
<!DOCTYPE html PUBLIC "-//W3C//DTD HTML 4.01 Transitional//EN" "http://www.w3.org/TR/html4/loose.dtd">
<html>
<head>
<meta http-equiv="Content-Type" content="text/html; charset=ISO-8859-1">
<title>Insert title here</title>
</head>
<body>
  <form:form action="formoutput.html" commandName="user"  >
   <table align="center" >
		<tr>
			<td>User Name :</td>
			<td><form:input path="userName" /></td>
		</tr>
		<tr>
			<td>Email :</td>
			<td><form:input path="email" /></td>
		</tr>
		<tr>
			<td></td>
			<td><input type="submit" value="Submit" /></td>
		</tr>
	</table>
  </form:form>
</body>
</html>
4. formoutput.html: This jsp page displays the message on the screen and here is it full code:
<%@ page language="java" contentType="text/html; charset=ISO-8859-1"
    pageEncoding="ISO-8859-1"%>
<%@taglib prefix="core" uri="http://java.sun.com/jsp/jstl/core" %>

<!DOCTYPE html PUBLIC "-//W3C//DTD HTML 4.01 Transitional//EN" "http://www.w3.org/TR/html4/loose.dtd">
<html>
<head>
<meta http-equiv="Content-Type" content="text/html; charset=ISO-8859-1">
<title>Insert title here</title>
</head>
<body>
   <table align="center" >
	    <tr>
	        <td>Welcome:</td>
	        <td><core:out value="${user.userName}" /></td>
	    </tr>
	    <tr>
	        <td>Your Email:</td>
	        <td><core:out value="${user.email}" /></td>
	    </tr>
  </table>

</body>
</html>
The code <core:out value="${user.userName}" /> is used to display the value of userName filed. Similarly <core:out value="${user.email}" /> is used to display the value of email field on the screen.
5. Mapping all these components in dispatcher-servlet.xml
The dispatcher-servlet.xml class is used to map the request, controller and views in the application. Here is the full code of dispatcher-servlet.xml in our application: 0
<?xml version="1.0" encoding="UTF-8"?>
<beans xmlns="http://www.springframework.org/schema/beans"
	xmlns:xsi="http://www.w3.org/2001/XMLSchema-instance" xmlns:p="http://www.springframework.org/schema/p"
	xmlns:context="http://www.springframework.org/schema/context"
	xmlns:mvc="http://www.springframework.org/schema/mvc"
	xsi:schemaLocation="
	http://www.springframework.org/schema/beans
	http://www.springframework.org/schema/beans/spring-beans-3.0.xsd
	http://www.springframework.org/schema/context
	http://www.springframework.org/schema/context/spring-context-3.0.xsd
	http://www.springframework.org/schema/mvc
	http://www.springframework.org/schema/mvc/spring-mvc-3.0.xsd
	">

	<!-- Enable annotation driven controllers, validation etc... -->
	<mvc:annotation-driven />

	<context:component-scan base-package="net.roseindia.controllers" />

	<bean id="viewResolver"
		class="org.springframework.web.servlet.view.InternalResourceViewResolver">

		<property name="prefix">
			<value>/WEB-INF/views/</value>
		</property>
		<property name="suffix">
			<value>.jsp</value>
		</property>
	</bean>

	<bean id="messageSource"
		class="org.springframework.context.support.ReloadableResourceBundleMessageSource">
		<property name="basename" value="/WEB-INF/messages" />
	</bean>

	<!-- Configure the multipart resolver -->
    <bean id="multipartResolver" class="org.springframework.web.multipart.commons.CommonsMultipartResolver">
    </bean>

</beans>
All the class files inside the package net.roseindia.controllers is scanned for controllers by the framework. Here is the code from above configuration file:
<context:component-scan base-package="net.roseindia.controllers" />
Finally we have to load the Spring Context on the web application start up. We will do this setting the the web.xml file. 1
6. Web application configuration in web.xml file.
Spring Context is configured in the web.xml file and here is the full code of web.xml file in our application.
<?xml version="1.0" encoding="UTF-8"?>
<web-app version="2.5" xmlns="http://java.sun.com/xml/ns/j2ee"
	xmlns:xsi="http://www.w3.org/2001/XMLSchema-instance"
	xsi:schemaLocation="http://java.sun.com/xml/ns/j2ee http://java.sun.com/xml/ns/j2ee/web-app_2_5.xsd">

	<display-name>Spring4Example</display-name>
	<servlet>
		<servlet-name>dispatcher</servlet-name>
		<servlet-class>org.springframework.web.servlet.DispatcherServlet</servlet-class>
		<load-on-startup>1</load-on-startup>
	</servlet>
	<servlet-mapping>
		<servlet-name>dispatcher</servlet-name>
		<url-pattern>/forms/*</url-pattern>
	</servlet-mapping>
	<welcome-file-list>
		<welcome-file>index.jsp</welcome-file>
	</welcome-file-list>
</web-app>
Following is actually configures the Dispatcher of Spring framework in our application: 2
<servlet>
<servlet-name>dispatcher</servlet-name>
<servlet-class>org.springframework.web.servlet.DispatcherServlet</servlet-class>
<load-on-startup>1</load-on-startup>
</servlet>
<servlet-mapping>
<servlet-name>dispatcher</servlet-name>
<url-pattern>/forms/*</url-pattern>
</servlet-mapping>
In next tutorial we will learn how to create Spring web Login form?