
In this tutorial we are going to teach you the steps to install TensorFlow 2.0 in Colab.
How to Install TensorFlow 2.0 in Colab?
Google is releasing the test versions of its upcoming TensorFlow 2.0 for testing and experimenting with it. TensorFlow 2.0 is highly upgraded version of TensorFlow and it comes with many new features and enhancement for development of next generation deep learning applications. Once it is released for the product it can be used highly scalable deep learning applications which can run on distributed cluster, mobile devices, edge devices and in web browser. So, developer should learn TensorFlow 2.0 and master this version of TensorFlow for development of deep learning models.
In this section we will show you how to install TensorFlow 2.0 in Colab environment. You will be able to connect to the Colab environment for testing and running your sample applications. Google Colab provides web browser interface for running your code. This is a short tutorial which will teach you to install TensorFlow 2.0 in Google Colab environment and then run a program to view the version of TensorFlow.
Step 1: Connect to Google Colab environment
First of all you have to connect to Google Colab environment. The Google Collaboration is free service for the developers to try TensorFlow on CPU and GPU over cloud instance of Google. This service is totally free for improving Python programming skills, developers can login with their Google Gmail account and connect to this service. Here developer can try deep learning applications using popular machine learning libraries such as Keras, TensorFlow, PyTorch, OpenCV and others. If you search Google Colab in Google Search then you will see following details.
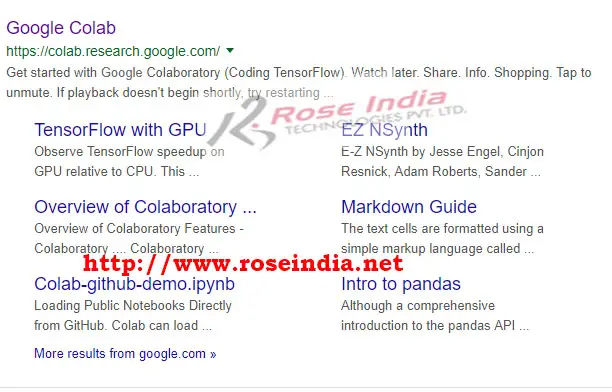
Now visit https://colab.research.google.com/ and you will see following information:

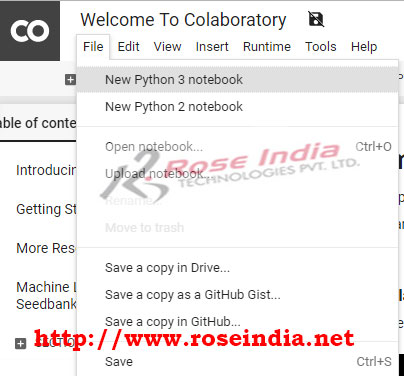
Step 2: Create Notebook
The step is to create a python 3 notebook to install TensorFlow 2.0 and run Python code on the Google Colab environment. To create a new note book click on the File and then select "New Python 3 notebook" option as shown below:
Above option will create a blank Python 3 notebook as shown below:
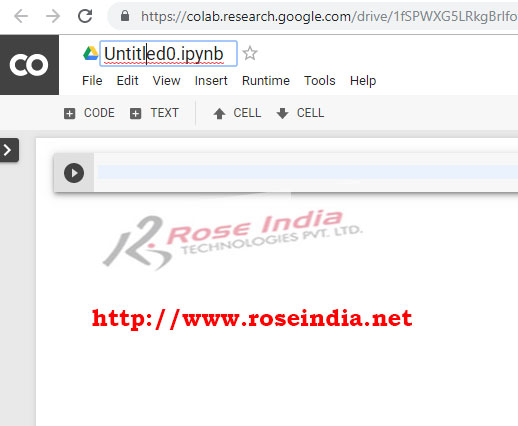
The Google Colab tool by default gives a name such as "Untitled0.ipynb" which you can change. I have changed it to "installing_tensorflow_2.0.ipynb".
Step 3: Connect to the CPU/GPU
Click on the Connect and then select "Connect to hosted runtime" to the Google Colab server as shown below:
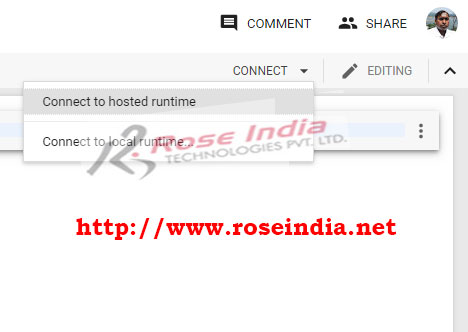
After successful connection to the hosted service it will display following icons on the Google Colab browser based development environment:

Step 4: Check the version of TensorFlow installed by default
Now run the following Python command in the tool to check the version of TensorFlow installed on the environment:
import tensorflow as tf
print(tf.__version__)
To run the code press Ctrl+Enter button or click on the run icon as shown below:
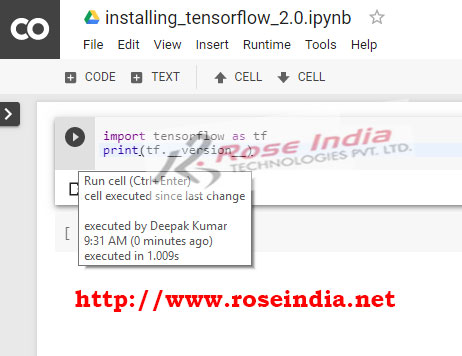
Now run the code to view the version of TensorFlow. Program displays "1.14.0-rc1". By default the production ready version of TensorFlow is installed on the server. Now we will first uninstall pre-installed TensorFlow and then install TensorFlow 2.0.
Step 5: Uninstall TensorFlow from Google Colab environment
To uninstall pre-installed TensorFlow run the following command:
!pip uninstall tensorflow
Above command will ask you to confirm before uninstalling as shown below:
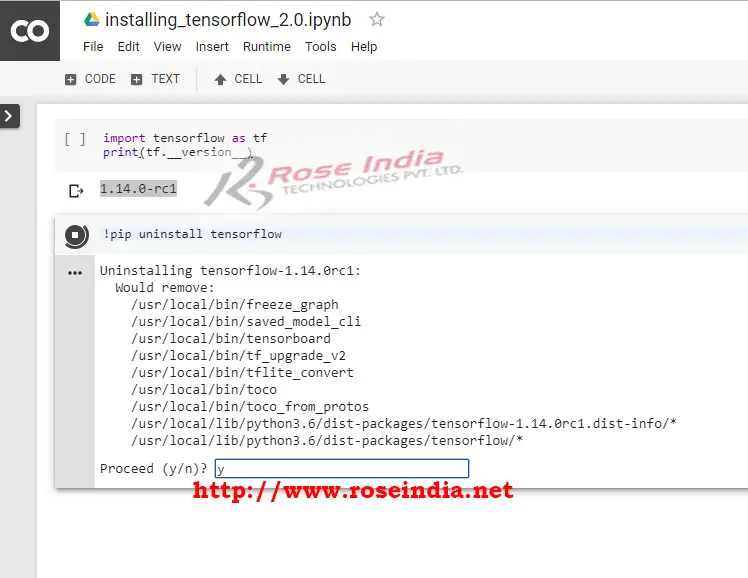
Above step will uninstall TensorFlow from Google Colab environment.
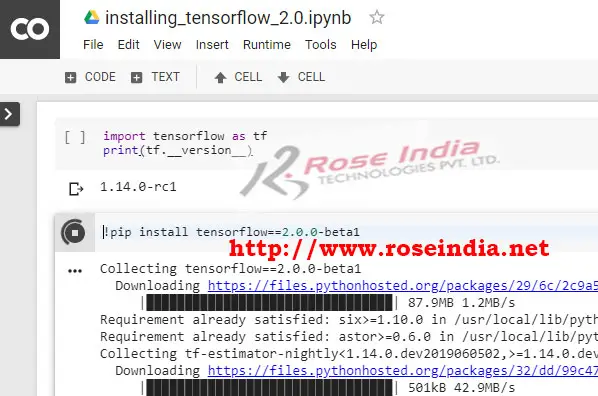
Step 6: Installing TensorFlow 2.0
Now run the following command to install TensorFlow 2.0 beta version on Google Colab environment: 0
!pip install tensorflow==2.0.0-beta1
TensorFlow 2.0.0 is already released as production version. For installing TensorFlow2.0.0 run the following command:
!pip install tensorflow==2.0.0
Here is the screen shot of the process:
 1
1
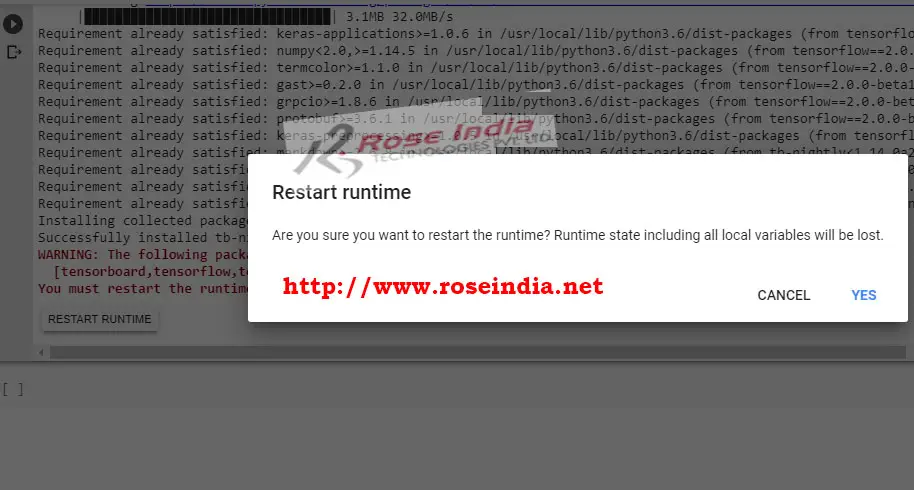
Now you have to restart the runtime as shown below:
Step 7: Testing TensorFlow 2.0 2
Now run the code to check the version of TensorFlow 2.0 installed on the Google Colab environment. Here is the screen shot of the program output:
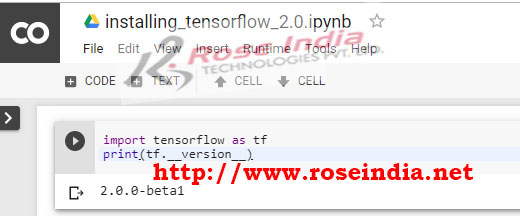
Congratulations you have successfully installed TensorFlow 2.0 beta on Google Colab environment. Now you can write your program and test. 3
In this tutorial I have explained you the steps to install latest version of TensorFlow 2.0 on the Google Colab environment. You can check more tutorials at TensorFlow 2.0 Tutorials section.
Video Instruction:
4
Stay, tuned for more tutorials and examples of TensorFlow 2.0 and check our website.