
Struts2 Application in Eclipse: Learn how to run the Struts2 application in Eclipse IDE
In this tutorial we will run the Struts2 application from Eclipse IDE. In the last section we have developed the Struts 2 Application in Eclipse IDE. Now we will show you how you can configure the Tomcat 7 and run the Struts2 application from Eclipse.
Eclipse is of the best free IDE for developing the applications which is very powerful and provides many features for debugging the applications. Developers are using the Eclipse IDE for building web application using Struts2 and other technologies. This tutorial explains you the steps necessary to run the Struts2 application in the Eclipse IDE. You will be able to code, compile and deploy the Struts2 Hello World application using Eclipse. For this tutorial we have used Eclipse JEE Helios IDE.
Step 1: Develop the application in Struts 2. For developing the Struts 2 application in Struts 2 read the tutorial Creating Hello World application in Struts 2 version 2.3.15.1. One the tutorial is ready in the Eclipse IDE you can follow the step 2 for configuring Eclipse IDE to use Tomcat 7 for deploying the Struts 2 application. Eclipse IDE will allow you to install and run Struts 2 application in one click.
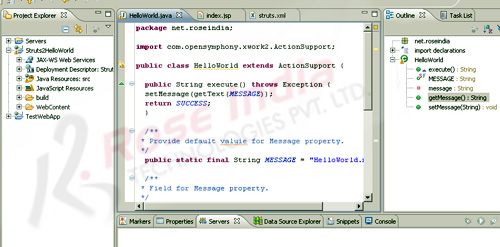
Step 2: Open the Eclipse and expand the Struts 2 Hello World application as shown below:
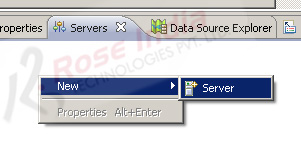
Step 3: Add a new Sever in Eclipse. To add the new Server go to the Servers tab and then right click and select New -> Server as shown below:
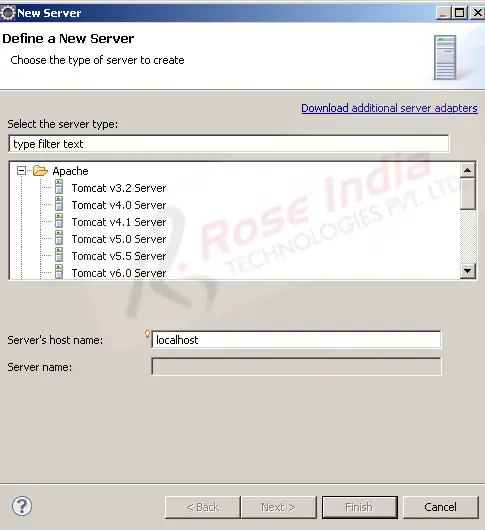
Step 4: Now Expand the Apache Server folder as shown below:

Then scroll down to the Tomcat v6.0 Server list:
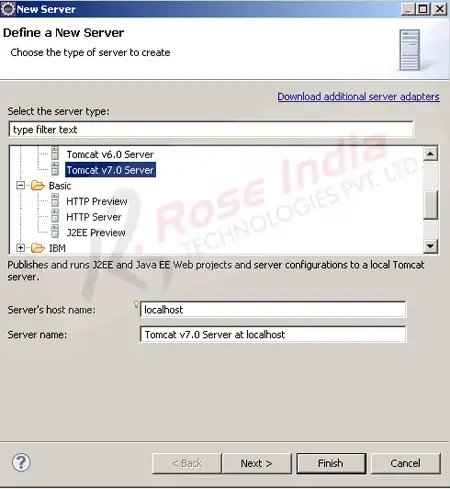
Tomcat support many different types of Servers such as Tomcat, Apache HTTP, IBM Websphere and so on. You can also download the connectors for different servers. In this example we are using the Tomat v7.0 for running the our application that's why we have to select Tomcat v7.0 Server.
Expand the Apache list and you can see the Tomcat v3.0 to Tomcat v7.0. Its very easy to deploy the application from Eclipse IDE. It helps the developer to increase the productivity. Now select the "Tomcat v7.0 Server" from the list as shown below:
Then click next and then on the click on the "Add" link next to the "Server runtime environment". Following window will be displayed to add a new server:
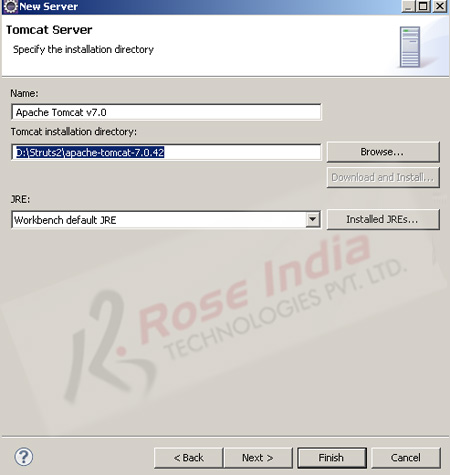
Add the path of Tomcat installation directory and click on the finish button.
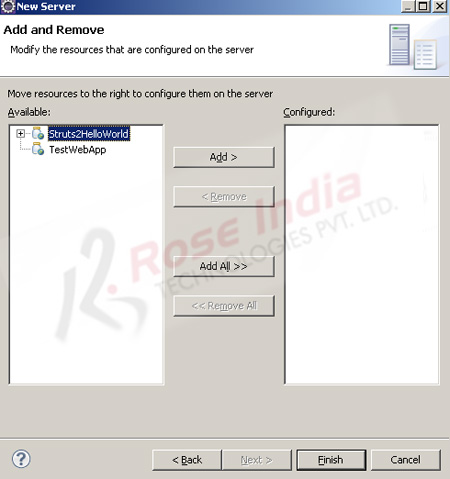
Step 5: Select the "Struts2HelloWorld" from the "Available" list and then click on the "Add >" button.
Application will added to the "Configured" list as shown below:
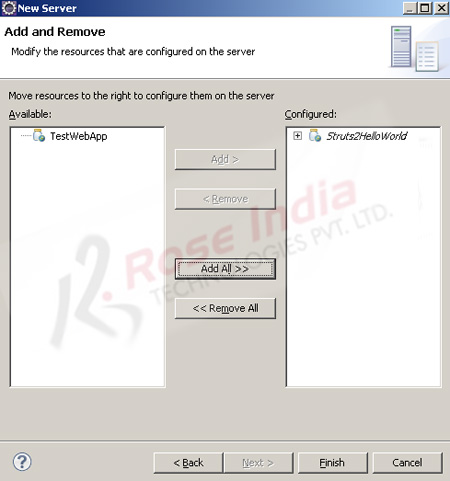
Click on the "Finish" button to add the application for running it on tomcat.
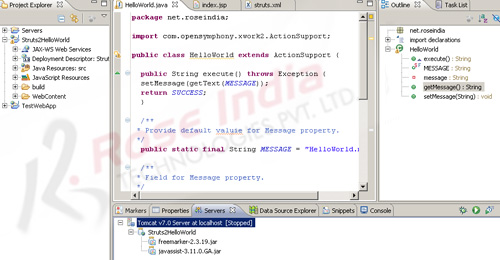
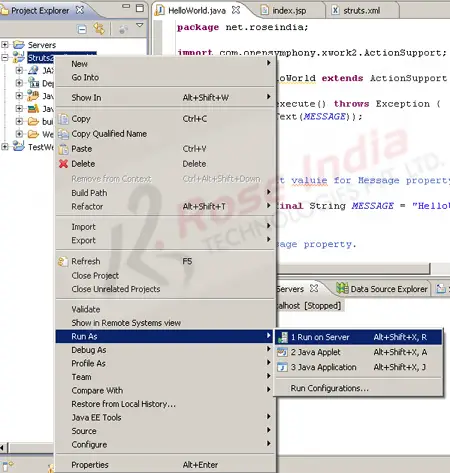
To run the application right click on the "Struts2HelloWorld" application and then select "Run As" -> "Run on Server" as shown below:
Then select the "Tomcat v7.0 Server at localhost" as shown below:

Then click on the finish button to run the application.
Following screen shot shows the running application: 0
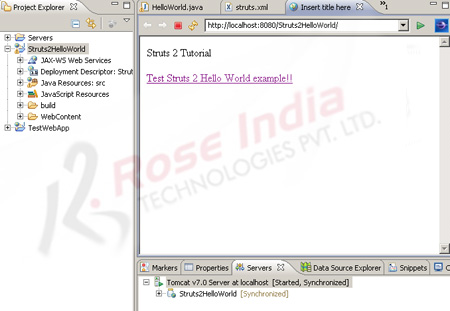
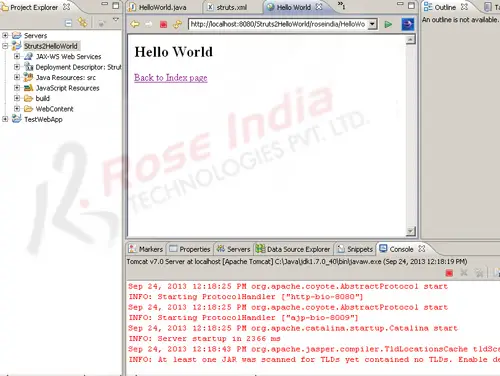
Click on the "Test Struts 2 Hello World example!!" link to run the Hello World Struts 2 example project. Following screen show shows the output of the program.
 1
1
In this tutorial you have learned the steps necessary for running Struts 2 application in Eclipse. You can continue reading more tutorials about Struts 2 at Struts 2 Tutorial index page.