Tomcat with Eclipse: How to configure Tomcat Server in Eclipse IDE?
During development of the Dynamic web application, we have run applications multiple times and it's very time consuming to build and run the application on Tomcat server. So, there is another easy way to use Tomcat, where you can configure Tomcat to run from the Eclipse IDE and make development life simple. In this tutorial we are going to show you the steps to configure Tomcat in your Eclipse IDE and run the application from Eclipse, which eases the development lifecycle.
The Eclipse IDE is a very popular Java Application development Integrated Development Environment (IDE), which is a free and powerful environment for development of Java applications. Eclipse is being used by developers around the world to make various types of Java Applications including Dynamic web applications. In this section we will configure Tomcat Server in Eclipse and run a dynamic web application.
We have recorded the steps in the form of video tutorial that will help you in learning the steps by watching the video instructions. Here is the video tutorial of configuring Tomcat in Eclipse IDE:
Lets start with the tutorials. Here are the steps of configuring Tomcat Server in Eclipse IDE:
Step 1: Download and Install Eclipse
First step is to download and install Eclipse. If you already have Eclipse IDE installed on your machine then you can go to step 2. If you don't know how to do this please check our tutorial: Downloading, Installing and Initializing Eclipse.
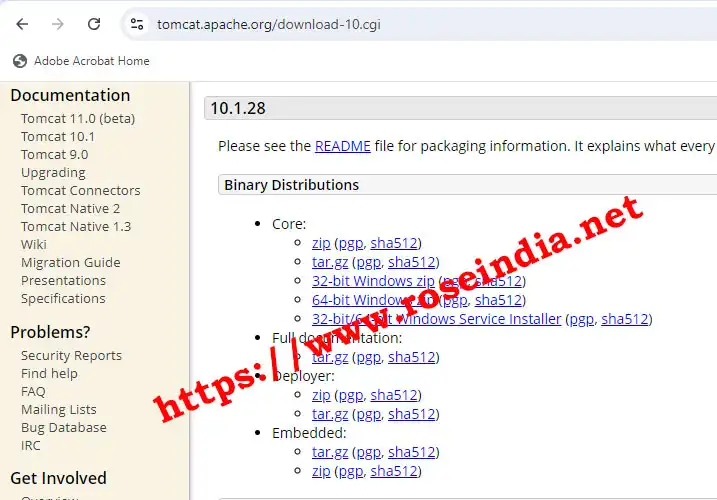
Step 2: Download Tomcat 10.x or latest version
In the next step you have to download Tomcat latest version from https://tomcat.apache.org/download-10.cgi. Here is the screenshot of the Tomcat download page at time of downloading Tomcat 10.1 for this tutorial:
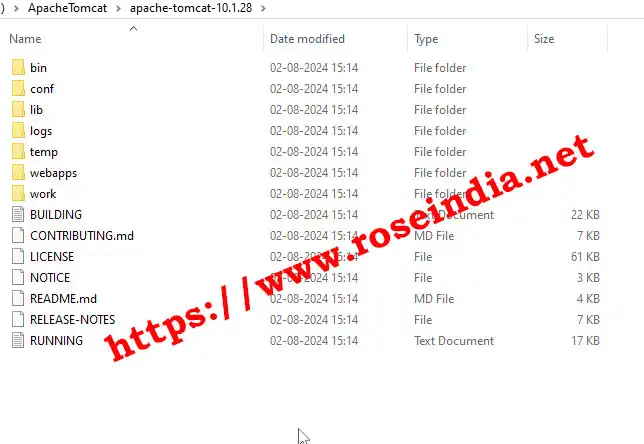
After downloading the Tomcat zip file, move it to a directory in your computer from where you would like to run the tomcat. Extract the downloaded zip file and you will get the following file in the directory where you extracted the file:
Step 3: Configure Tomcat 10.x in Eclipse
Next step is to configure Tomcat 10.x in the Eclipse IDE. For this open the Eclipse IDE and go to the Servers tab as shown below:
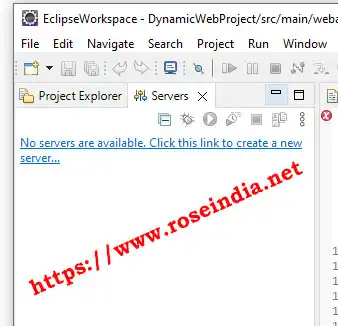
Click on the link "Click this link to create a new server ..." and you will be presented with the following screen to add the server:
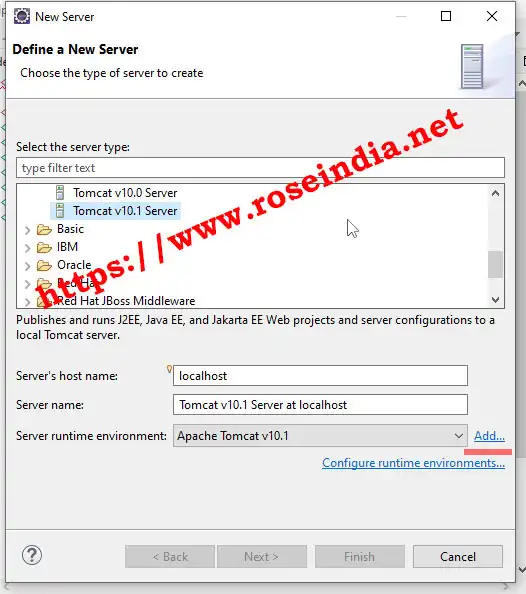
Next click on the Add and then provide the directory of Tomcat 10.x on your machine as shown below:
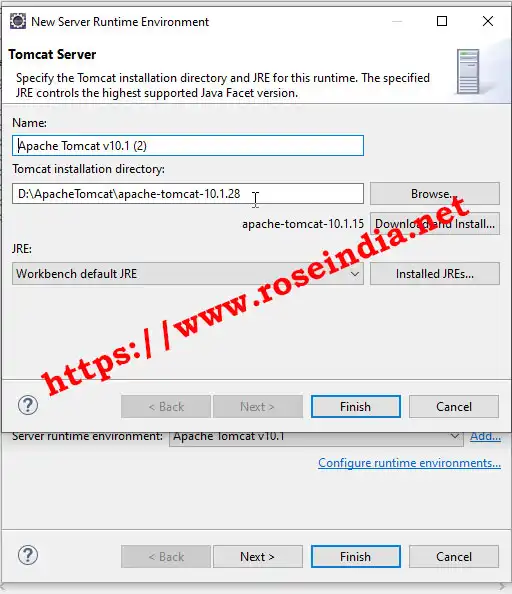
Then click "Finish" and again "Finish". Now the Tomcat is configured in your Eclipse IDE.
Step 4: Run Dynamic Web application on Tomcat 10.x in Eclipse
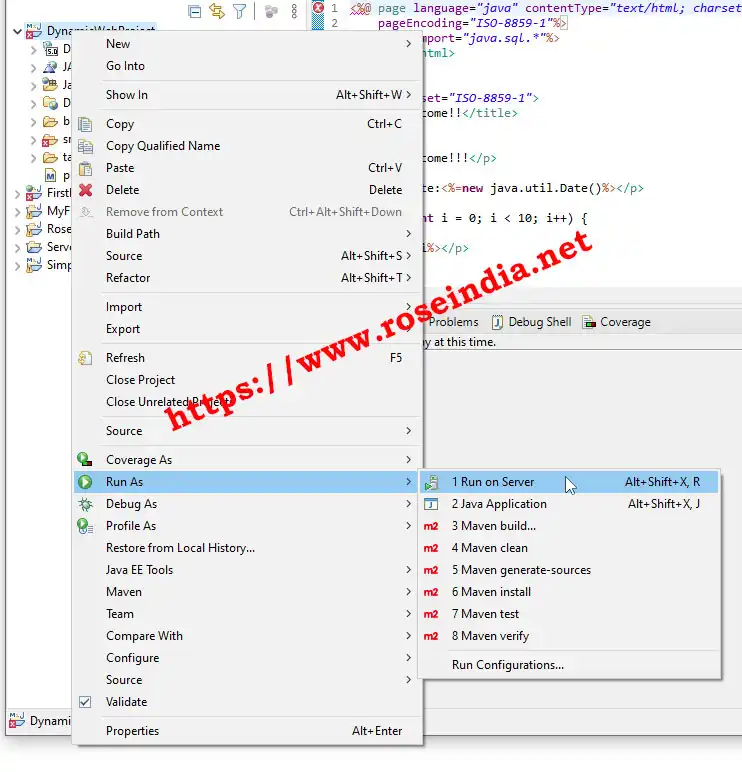
Now are ready to run our Dynamic Web Application on Tomcat from Eclipse. Right click on the project and select "Runs As" -> "Run on Server" as shown below:
In the next window you have to select Tomcat server as shown below:
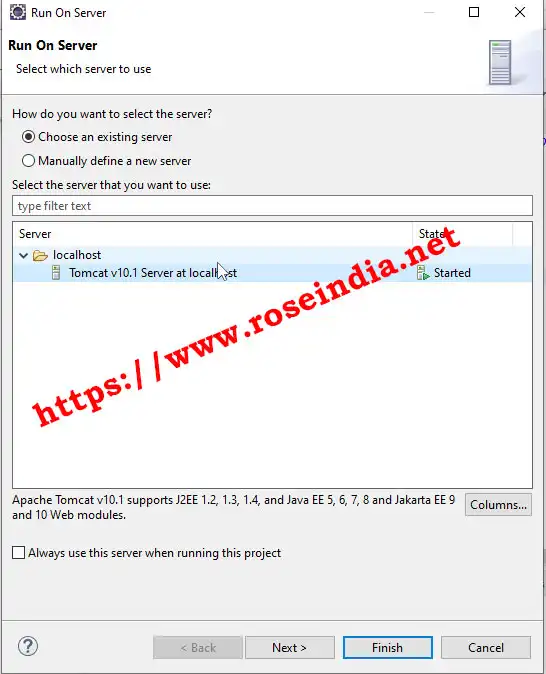
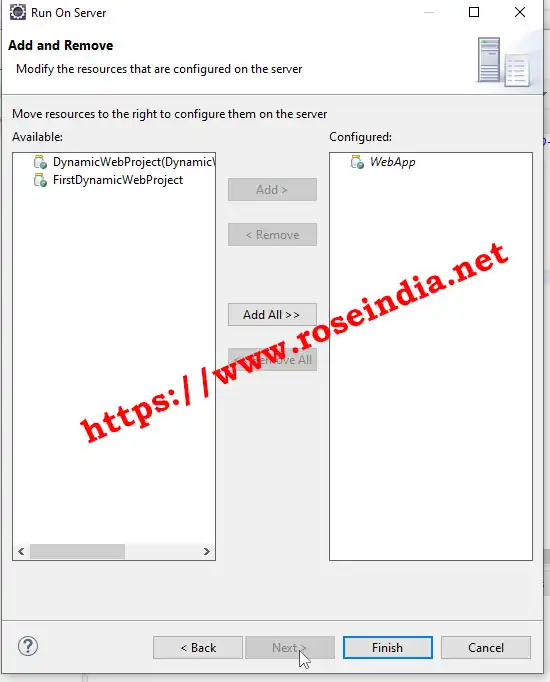
Next click on "Next" button and then select your web application to run it on Tomcat as shown below:
Now click finish and your application should run in the Tomcat. Eclipse will also open the browser and show your application. In this tutorial we have learned the steps to configure Tomcat Server in Eclipse IDE and run the web application.
Here are more tutorials: