
Hibernate 4 Hello World: Learn how to create first Hello World example program in Hibernate 4.3
In this section we I will explain you how to write the program using the latest version of Hibernate which is Hibernate 4.3.1 at the time of writing of this tutorial. You will learn how to download the Hibernate 4.3.1 final version and then use the Eclipse IDE writing and running the example program.
Now this version of Hibernate 4.3.x ORM is supporting the latest version of JPA which is JPA 2.1. You can learn about JPA 2.1 at JPA 2.1 tutorial section.
Prerequisites:
- JDK 7 or above must be installed on your computer
- Eclipse IDE is required
- MySQL database server should be running and accessible
- You should have good knowledge of Java programming and JDBC programming
Here is the video tutorial of "How to create Hibernate 4 Hello World Program?":
We have used the Eclipse IDE for coding and testing of the application. This is one of the first Hibernate 4 tutorial that you should learn first. In this tutorial I will teach you the process of creating your very first Hibernate example Step by Step.
Step 1: Download the Hibernate 4.3.x
Visit and then download the latest version of Hibernate 4.3.x as shown below:

Step 2: Create database and table
Connect to MySQL server using any IDE or command line tool. Use the following query to create database:
create database hibernate4;
Now you should connect to database using following sql:
mysql> connect hibernate4;
Connection id:    3
Current database: hibernate4

mysql>
Use the following query to create the table:
CREATE TABLE `employee` (
            `id` int(11) NOT NULL AUTO_INCREMENT,
            `emp_name` varchar(100) DEFAULT NULL,
            `emp_address` varchar(500) DEFAULT NULL,
            `emp_mobile_nos` varchar(100) DEFAULT NULL,
            PRIMARY KEY (`id`)
          )
Step 3: Add libraries
Crete a new folder lib in the project and then copy all the JAR files from the required directory of Hibernate download.
Now you should download the MySQL Java connector library and then copy the mysql-connector-java-5.1.27-bin.jar file in your project.
Finally add the libraries to the project's build path. If you don't know how to add the libraries files into the project build path then check our tutorial: Hibernate Example Step by Step in Eclipse - The easiest way of getting started with the development of application in Hibernate.
Step 4: Create model class
You should add the following code in the "Employee.java" file:
package net.roseindia;
import java.io.Serializable;

import javax.persistence.Column;
import javax.persistence.Entity;
import javax.persistence.GeneratedValue;
import javax.persistence.Id;

import javax.persistence.Table;
/**
 * @author Deepak Kumar
 * Web: http://www.roseindia.net
 */
@Entity
@Table(name = "employee")
public class Employee implements Serializable{

	@Id
	@GeneratedValue
	@Column(name="id")
	private int id;

	@Column(name="emp_name")
	private String empName;

	@Column(name="emp_address")
	private String empAddress;

	@Column(name="emp_mobile_nos")
	private String empMobileNos;

	public int getId() {
		return id;
	}

	public void setId(int id) {
		this.id = id;
	}

	public String getEmpName() {
		return empName;
	}

	public void setEmpName(String empName) {
		this.empName = empName;
	}

	public String getEmpAddress() {
		return empAddress;
	}

	public void setEmpAddress(String empAddress) {
		this.empAddress = empAddress;
	}

	public String getEmpMobileNos() {
		return empMobileNos;
	}

	public void setEmpMobileNos(String empMobileNos) {
		this.empMobileNos = empMobileNos;
	}

}
Above file id annotated with the JPA annotations and maps the entity with the "employee" table of the database.
We have used following annotations in the model class:
org.hibernate.annotations.Table: for mapping it to a table
javax.persistence.Column: for mapping the entity field with the table column
javax.persistence.Entity: for specifying a class as an entity class
javax.persistence.GeneratedValue: primary key generation strategy.
javax.persistence.Id: The primary key of the entity
javax.persistence.Table: for mapping it to the database table
Step 5: Create hibernate.cfg file
Add the hibernate.cfg file ( create a new file in the src folder of eclipse) with the following code: 0
<!DOCTYPE hibernate-configuration PUBLIC
        "-//Hibernate/Hibernate Configuration DTD 3.0//EN"
        "http://www.hibernate.org/dtd/hibernate-configuration-3.0.dtd">
<hibernate-configuration>

<session-factory>
<property name="hibernate.connection.driver_class">com.mysql.jdbc.Driver</property>
<property name="hibernate.connection.url">jdbc:mysql://localhost:3306/hibernate4</property>
<property name="hibernate.connection.username">root</property>
<property name="hibernate.connection.password">root</property>
<property name="hibernate.connection.pool_size">10</property>
<property name="show_sql">true</property>
<property name="hibernate.dialect">org.hibernate.dialect.MySQLDialect</property>
<property name="hibernate.current_session_context_class">thread</property>

<mapping class="net.roseindia.Employee" />

</session-factory>
</hibernate-configuration>
Step 6: Create the utility class for getting SessionFactory
In Hibernate 4.3.0 and above versions there are many change in the API. Here are the few errors you will be encountered if you don't create the SessionFactory in correct way:
* The type ServiceRegistryBuilder is deprecated
* The method buildServiceRegistry() is undefined for the type
ServiceRegistryBuilder
* The method buildSessionFactory() from the type Configuration is deprecated
1
So, overcome these errors the correct way to create the SessionFactory is given below:
	Configuration cfg = new Configuration().configure("hibernate.cfg.xml");
	StandardServiceRegistryBuilder sb = new StandardServiceRegistryBuilder();
	sb.applySettings(cfg.getProperties());
	StandardServiceRegistry standardServiceRegistry = sb.build();
	sessionFactory = cfg.buildSessionFactory(standardServiceRegistry);
Following is the code of the HibernateUtil.java file which shows you how to get the instance of SessionFactory correctly in Hibernate 4.3.0, Hibernate 4.3.1 final and future versions of Hibernate 4.3.x:
package net.roseindia;
import org.hibernate.SessionFactory;

import org.hibernate.boot.registry.StandardServiceRegistryBuilder;
import org.hibernate.cfg.Configuration;
import org.hibernate.boot.registry.StandardServiceRegistry;

/**
 * @author Deepak Kumar
 * * Web: http://www.roseindia.net
 */
public class HibernateUtil {
    private static final SessionFactory sessionFactory;

    static {
            try {
            	Configuration cfg = new Configuration().configure("hibernate.cfg.xml");
            	StandardServiceRegistryBuilder sb = new StandardServiceRegistryBuilder();
            	sb.applySettings(cfg.getProperties());
            	StandardServiceRegistry standardServiceRegistry = sb.build();
            	sessionFactory = cfg.buildSessionFactory(standardServiceRegistry);
            } catch (Throwable th) {
                    System.err.println("Enitial SessionFactory creation failed" + th);
                    throw new ExceptionInInitializerError(th);
            }
    }
    public static SessionFactory getSessionFactory() {
            return sessionFactory;
    }
}
Step 7: Write the code for testing the Hello World Hibernate example. 2
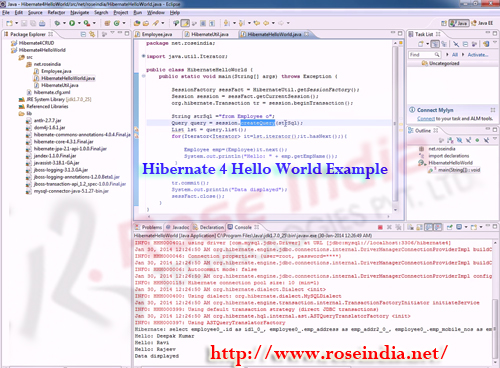
Here is the source code of the HibernateHelloWorld.java file:
package net.roseindia;

import java.util.Iterator;
import java.util.List;

import org.hibernate.Query;
import org.hibernate.Session;
import org.hibernate.SessionFactory;

/**
 * @author Deepak Kumar
 * * Web: http://www.roseindia.net
 */
public class HibernateHelloWorld {
	public static void main(String[] args) throws Exception {

		SessionFactory sessFact = HibernateUtil.getSessionFactory();
		Session session = sessFact.getCurrentSession();
		org.hibernate.Transaction tr = session.beginTransaction();

		String strSql ="from Employee o";
		Query query = session.createQuery(strSql);
		List lst = query.list();
		for(Iterator it=lst.iterator();it.hasNext();){

			Employee emp=(Employee)it.next();
			System.out.println("Hello: " + emp.getEmpName());
		 }

		tr.commit();
		System.out.println("Data displayed");
		sessFact.close();
	}
}
}
In the above code we are display the message "Hello:" + Employee name.
In this tutorial you have learned how to create Hibernate Hello World example which simply fetches the employee entity from database and displays on the console. You have also learned the new way of creating the SessionFactory in Hibernate 4.3. 3
Download the source code of the Hibernate 4.3.1 Hello World Example in the Maven Project format.
Read Complete Hibernate 4.3.x tutorial at Hibernate 4.3.x home page.