Hibernate 3 Query Example Part 2


Hibernate 3 Query Example Part 2
This tutorial explains how to create Hibernate 3 query example with Spring 3 MVC based annotations. This example is created in ellipse IDE and run in tomcat server.
We will also show you how to run the example from Eclipse IDE and test on Tomcat server. We have also given the screen shot of the example. You can easily download Hibernate 3 Query example and run on your computer.
This example is very helpful for beginners in learning concepts of Hibernate and Spring.
Step 10 :
Now Create "view" folder under "WebContent/WEB-INF" .Again create one jsp file "articlesList.jsp" in "view" folder . The code of "articlesList.jsp" given below as :
|
<%@ taglib uri="http://java.sun.com/jsp/jstl/core" prefix="c"%> <html> <head> <title>All Articles</title> </head> <body> <c:if test="${!empty articles}"> <h1 align="center">List Articles</h1> <hr width=500 > <table> <tr> <th>Article ID</th> <th>Article Name</th> <th>Article Description</th> <th>Added Date</th> </tr> <c:forEach items="${articles}" var="article"> <tr> <td><c:out value="${article.articleId}"/></td> <td><c:out value="${article.articleName}"/></td> <td><c:out value="${article.articleDesc}"/></td> <td><c:out value="${article.addedDate}"/></td> </tr> </c:forEach> </table> </c:if> <c:if test="${empty articles}"> <c:out value="Not Available Article Details"></c:out> </c:if> </body> </html> |
Step 11 :
Now create "searcharticle.jsp" jsp file under "WebContent/WEB-INF/view" directory . The code of "searcharticle.jsp" given below :
|
<%@ taglib uri="http://java.sun.com/jsp/jstl/core" prefix="c"%> <%@
taglib
uri="http://www.springframework.org/tags/form" <html> <head><title>Add Article</title></head> <script language="JavaScript"> function Validate(){ var articleid =document.getElementById("articleid").value; if(articleid=="" || articleid.length<1){ alert( "Please enter article id." ); document.getElementById("articleid").focus(); return false; } if ( isNaN( articleid ) ){ alert( "Please enter a valid article id." ); return false; } return true; } </script> <body> <h1 align="center">Search Article</h1> <hr width=500 > <c:url var="viewArticlesUrl" value="/articles.html" /> <br /> <br /> <c:url var="saveArticleUrl" value="/articles/save.html" /> <form:form
modelAttribute="article"
method="POST"
onsubmit="return Validate();"> <table align="center"> <tr> <td><form:label path="articleId">Article Id:</form:label></td> <td><form:input path="articleId" id="articleid" /></td> <form:errors path="articleId" > </form:errors> </tr> <tr> <td></td> <td><input type="submit" value="Search" /></td> </tr> </table> <br/> </form:form> </body> </html> |
Step 12 :
Now open "web.xml" file and modify as :
|
<?xml version="1.0" encoding="UTF-8"?> <web-app xmlns:xsi="http://www.w3.org/2001/XMLSchema-instance" xmlns="http://java.sun.com/xml/ns/javaee"
xmlns:web= xsi:schemaLocation="http://java.sun.com/xml/ns/javaee
http: version="2.5"> <servlet> <servlet-name>dispatcher</servlet-name> <servlet-class> <load-on-startup>1</load-on-startup> </servlet> <servlet-mapping> <servlet-name>dispatcher</servlet-name> <url-pattern>*.html</url-pattern> </servlet-mapping> <welcome-file-list> <welcome-file>index.html</welcome-file> </welcome-file-list> </web-app> |
Step 13 :
Now create "dispatcher-servlet.xml" file under "WebContent/WEB-INF" directory . The code of "dispatcher-servlet.xml" given below as :
|
<?xml version="1.0" encoding="UTF-8"?> <beans xmlns="http://www.springframework.org/schema/beans" xmlns:xsi="http://www.w3.org/2001/XMLSchema-instance" xmlns:context="http://www.springframework.org/schema/context" xmlns:tx="http://www.springframework.org/schema/tx" xsi:schemaLocation=" http://www.springframework.org/schema/beans http://www.springframework.org/schema/beans/spring-beans-3.0.xsd http://www.springframework.org/schema/context http://www.springframework.org/schema/context/spring-context-3.0.xsd http://www.springframework.org/schema/tx http://www.springframework.org/schema/tx/spring-tx-3.0.xsd"> <context:property-placeholder location="classpath:jdbc.properties" /> <context:component-scan base-package="net.roseindia" /> <tx:annotation-driven transaction-manager="hibernateTransactionManager"/> <bean id="jspViewResolver" class="org.springframework.web.servlet.view.InternalResourceViewResolver"> <property name="viewClass" value="org.springframework.web.servlet.view.JstlView" /> <property name="prefix" value="/WEB-INF/view/" /> <property name="suffix" value=".jsp" /> </bean> <bean id="dataSource" class="org.springframework.jdbc.datasource.DriverManagerDataSource"> <property name="driverClassName" value="${database.driver}" /> <property name="url" value="${database.url}" /> <property name="username" value="${database.user}" /> <property name="password" value="${database.password}" /> </bean> <bean
id="sessionFactory"
class="org.springframework.orm.hibernate3.annotation <property name="dataSource" ref="dataSource" /> <property name="annotatedClasses"> <list> <value>net.roseindia.model.Article</value> </list> </property> <property name="hibernateProperties"> <props> <prop key="hibernate.dialect">${hibernate.dialect}</prop> <prop key="hibernate.show_sql">${hibernate.show_sql}</prop> </props> </property> </bean> <bean id="hibernateTransactionManager" class="org.springframework.orm.hibernate3.HibernateTransactionManager"> <property name="sessionFactory" ref="sessionFactory" /> </bean> </beans> |
Step 14 :
When run "Hibernate3QueryExample" on tomcat server display output as :
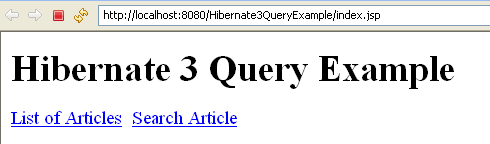
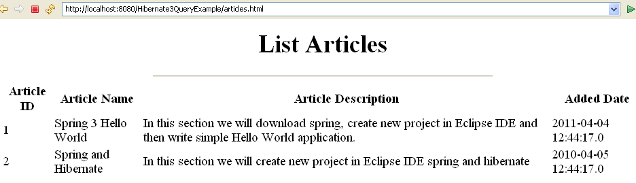
When click hyperlink "List of Articles" display output as :
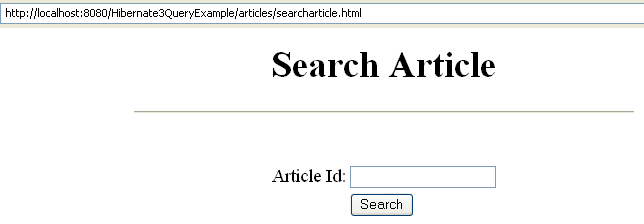
If click hyperlink "Search Article" then open the search article page as :
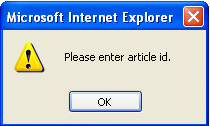
If click "Search" Button without entering any number, it displays error message as :
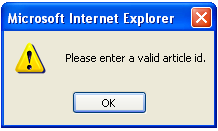
If you enter any invalid number then it displays error message as :
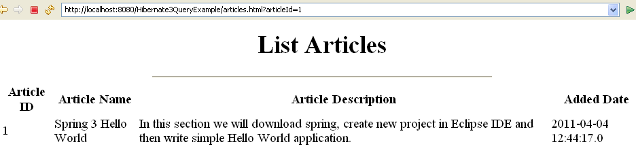
If you enter article id that exists in table, then it displays article details as :
Download Code