How to design a steel text in the Photoshop
It is a great effort to make steel text in the photoshop, you will learn here to make your own steel text after that adjust it like a text. I hope it will give extra knowledge to the beginners.
Let's Follow.
Take a New File: First take any size of file and write "I" as I have done here.

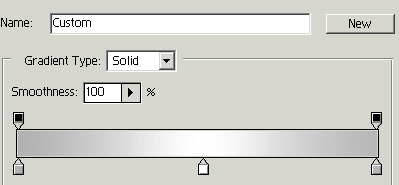
Gradient Overlay: Go to Layer Menu > Layer Style > Gradient Overlay and make setting as given below.


Your image will look like this.

Selection: Hold Ctr key and click on the layer, it will automatically select and make copy.

Take a Final New File: Now take a new file in which you want to write steel text, paste you copied as up.

Past again and press Ctrl + T then rotate and set as given below.

Past and set.

Past and set.

Past and set.

Past and set.

Past and set.


