Spring 3 MVC Login Form Example
In this tutorials we are showing you and example to create LoginForm in Spring 3.0. In this tutorial we are using annotation based Controller and other required configuration files.
In this tutorials we are showing you and example to create LoginForm in Spring 3.0. In this tutorial we are using annotation based Controller and other required configuration files.Spring 3 MVC Login Form Example
In this tutorials we are showing you and example to create LoginForm in Spring 3.0. In this tutorial we are using annotation based Controller and other required configuration files.
In the example we are creating a LoginForm. In the login form there are two input fields; username and password for entering username and password respectively. If any user enter correct username and password then login success page is displayed.
Note: You should login with following credential for success:
UserName: "UserName"
Password: "password"
If you enter any other values application will display error.
You can also extend this example and add database support.
Here is the video tutorial of "Spring 3.0 MVC Login Form Example":
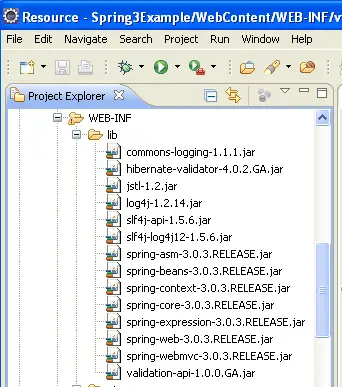
In this Application use the following jar files.
Step 1:
First create a Dynamic Web Project "Spring3Example". Now create a "index.jsp" under WebContent folder.The code of "index.jsp" as:
|
<%@ page language="java" contentType="text/html; charset=ISO-8859-1" pageEncoding="ISO-8859-1"%><! DOCTYPE html PUBLIC "-//W3C//DTD HTML 4.01 Transitional//EN" "http://www.w3.org/TR/html4/loose.dtd">< html>< head>< meta http-equiv="Content-Type" content="text/html; charset=ISO-8859-1">< title>Spring 3, MVC Examples</title></ head>< body>< h1>Spring 3, MVC Examples</h1>< ul> <li><a href="forms/loginform.html">Login Form</a></li></ ul></ body></ html> |
Step 2:
Now create a form class "LoginForm.java" under src folder. LoginForm.java use the two variable userName and password. The code of "LoginForm.java" is:
package net.roseindia.form;
import javax.validation.constraints.Size;
import org.hibernate.validator.constraints.NotEmpty;
public class LoginForm {
	@NotEmpty
	@Size(min = 1, max = 50)
	private String userName;
	@NotEmpty
	@Size(min = 1, max = 20)
	private String password;

	public void setUserName(String userName) {
		this.userName = userName;
	}
	public String getUserName() {
		return userName;
	}
	public void setPassword(String password) {
		this.password = password;
	}
	public String getPassword() {
		return password;
	}
}
Step 3:
Now create the Controller class "LoginController.java" under src folder. The "LoginController.java" code is :
package net.roseindia.controllers;

import org.springframework.stereotype.Controller;
import org.springframework.web.bind.annotation.RequestMapping;
import org.springframework.web.bind.annotation.RequestMethod;
import org.springframework.validation.BindingResult;
import java.util.Map;
import javax.validation.Valid;

import net.roseindia.form.LoginForm;

@Controller
@RequestMapping("loginform.html")
public class LoginController {
	@RequestMapping(method = RequestMethod.GET)
	public String showForm(Map model) {
		LoginForm loginForm = new LoginForm();
		model.put("loginForm", loginForm);
		return "loginform";
	}

	@RequestMapping(method = RequestMethod.POST)
	public String processForm(@Valid LoginForm loginForm, BindingResult result,
			Map model) {
		String userName = "UserName";
		String password = "password";
		if (result.hasErrors()) {
			return "loginform";
		}
		loginForm = (LoginForm) model.get("loginForm");
		if (!loginForm.getUserName().equals(userName)
				|| !loginForm.getPassword().equals(password)) {
			return "loginform";
		}
		model.put("loginForm", loginForm);
		return "loginsuccess";
	}

}
Step 4:
Now create the views folder under WebContent/WEB-INF. Again create the "loginform.jsp" under views folder, the path of the "loginform.jsp" is WebContent/WEB-INF/views/loginform.jsp. The code of "loginform.jsp" is:
|
<%@ page language="java" contentType="text/html; charset=ISO-8859-1" pageEncoding="ISO-8859-1"%><%@ taglib prefix="form" uri="http://www.springframework.org/tags/form"%><! DOCTYPE html PUBLIC "-//W3C//DTD HTML 4.01 Transitional//EN" "http://www.w3.org/TR/html4/loose.dtd">< html>< head>< meta http-equiv="Content-Type" content="text/html; charset=ISO-8859-1">< title>Spring3Example</title></ head>< body>< h3>Login Form</h3>< FONT color="blue">< h6>User Name="UserName" and password="password"</h6></ FONT>< form:form action="loginform.html" commandName="loginForm"> <table> <tr> <td>User Name:<FONT color="red"><form:errors path="userName" /></FONT></td> </tr> <tr> <td><form:input path="userName" /></td> </tr> <tr> <td>Password:<FONT color="red"><form:errors path="password" /></FONT></td> </tr> <tr> <td><form:password path="password" /></td> </tr> <tr> <td><input type="submit" value="Submit" /></td> </tr> </table></ form:form></ body></ html> |
Step 5:
Now create the "loginsuccess.jsp" under views folder,the path of the "loginsuccess.jsp" is WebContent/WEB-INF/views/loginsuccess.jsp. The code of the "loginsuccess.jsp" is:
|
<%@ page language="java" contentType="text/html; charset=ISO-8859-1" pageEncoding="ISO-8859-1"%><%@ taglib prefix="core" uri="http://java.sun.com/jsp/jstl/core"%><! DOCTYPE html PUBLIC "-//W3C//DTD HTML 4.01 Transitional//EN" "http://www.w3.org/TR/html4/loose.dtd">< html>< head>< meta http-equiv="Content-Type" content="text/html; charset=ISO-8859-1">< title>Spring3Example</title></ head>< body>< h3>Welcome <core:out value="${loginForm.userName}" /></h3>< table> <tr> <td><a href="loginform.html">Back</a></td> </tr></ table></ body></ html> |
Step 6:
Now modify the "web.xml" file under WEB-INF. The code of web.xml is :
|
<? xml version="1.0" encoding="UTF-8"?>< web-app version="2.5" xmlns="http://java.sun.com/xml/ns/j2ee" xmlns:xsi="http://www.w3.org/2001/XMLSchema-instance" xsi:schemaLocation="http://java.sun.com/xml/ns/j2ee http://java.sun.com/xml/ns/j2ee/web-app_2_5.xsd"> <display-name>Spring3Example</display-name> <servlet> <servlet-name>dispatcher</servlet-name> <servlet-class>org.springframework.web.servlet.DispatcherServlet</servlet-class> <load-on-startup>1</load-on-startup> </servlet> <servlet-mapping> <servlet-name>dispatcher</servlet-name> <url-pattern>/forms/*</url-pattern> </servlet-mapping> <welcome-file-list> <welcome-file>index.jsp</welcome-file> </welcome-file-list></ web-app> |
Step 7:
Now create the file "dispatcher-servlet.xml" under WebContent/WEB-INF. The code of "dispatcher-servlet.xml" is:
|
<? xml version="1.0" encoding="UTF-8"?>< beans xmlns="http://www.springframework.org/schema/beans" xmlns:xsi="http://www.w3.org/2001/XMLSchema-instance" xmlns:p="http://www.springframework.org/schema/p" xmlns:context="http://www.springframework.org/schema/context" xmlns:mvc="http://www.springframework.org/schema/mvc" xsi:schemaLocation="http://www.springframework.org/schema/beans http://www.springframework.org/schema/beans/spring-beans-3.0.xsd http://www.springframework.org/schema/context http://www.springframework.org/schema/context/spring-context-3.0.xsd http://www.springframework.org/schema/mvc http://www.springframework.org/schema/mvc/spring-mvc-3.0.xsd " > <!-- Enable annotation driven controllers, validation etc... --> <mvc:annotation-driven /> <context:component-scan base-package="net.roseindia.controllers" /> <bean id="viewResolver" class="org.springframework.web.servlet.view.InternalResourceViewResolver"> <property name="prefix"> <value>/WEB-INF/views/</value> </property> <property name="suffix"> <value>.jsp</value> </property> </bean> <bean id="messageSource" class="org.springframework.context.support.ReloadableResourceBundleMessageSource"> <property name="basename" value="/WEB-INF/messages" /> </bean></ beans> |
Step 8:
Now create the messages properties file "messages.properties" under WebContent/WEB-INF,and modify the "messages.properties" as:
|
NotEmpty.loginForm.userName= must not be blank.Size.loginForm.userName= size must between 1 to 50 characters.NotEmpty.loginForm.password= must not be blank.Size.loginForm.password= size must between 1 to 20 characters. |
Step 9:
Now run Application display output as:
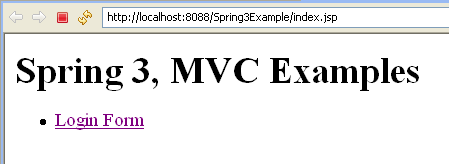
When click on hyperlink Login Form then display login form as :
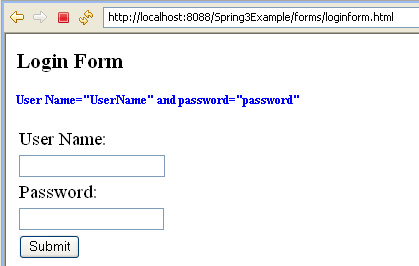
Where second line display suggestion of User Name and password field.
Step 10:
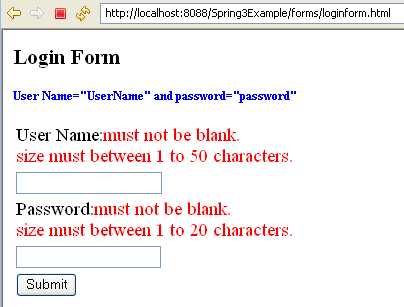
When press Submit without any value then display error messages as:
Step 11:
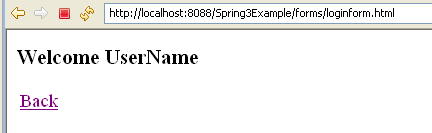
Again when enter right user name "UserName" and password "password" and press Submit then display login success page as:
Download Code
Download the code of the application discussed here from the following url.